DESIGN PRINCIPLES-EXERCISES
DESIGN PRINCIPLE-EXERCISE

28/8/2019 - 21/10/2019 (Week 1- Week 11)
Alfie Koh Chen Fong(0340310)
Design Principles
Exercise
INSTRUCTION
Week 10(28/10/19): No class
Because of the Deepavali holiday, we doesn't have class for design principle.
Week 9(24/10/19): Ilham gallery
Week 9(21/10/19-27/10/19): Symbol, image, words
LECTURE
1. Symbol: Symbol is a mark, sign or word that indicates, signifies, or is understood as representing an idea, object or relationship.
There are some types of symbol such as pictorial symbols, functional symbols, conceptual symbols, conventional symbols, abstract/geometric symbols.
a. Pictorial symbols: Appear as the real-world feature. Although it is often in a generalized manner.(IMG 9.01)
 |
| IMG 9.01 Pictorial symbols |
b.Conceptual symbols: It represents a concept related to the represented feature.(IMG 9.02)
 |
| IMG 9.02 Conceptual symbols |
c. Abstract/geometric symbols: Arbitary shapes chosen by the cartographer to represent a certain feature.(IMG 9.03)
 |
| IMG 9.03 Abstract/geometric symbol |
 |
IMG 9.04 Functional symbols
|
 |
| IMG 9.05 Conventional symbols |
2. Image: A visual representation of the external form of a person or thing in art. There are some types and techniques which are used in image such as monochrome, flat, vector, knolling, skeuomorphism, crop, contrast, blur, saturation and opacity.
a. Monochrome: It is used to describe design or photograph in one color or different shades of the single color.(IMG 9.06)
 |
| IMG 9.06 A photo whic is in monochrome |
b. Flat: Flat design is a minimalistic approach that focuses in simplicity and usability. It tends to feature plenty of open space, crisp edges, bright colors and two dimensional illustration.
(IMG 9.07)
(IMG 9.07)
 |
| IMG 9.07 Flat illustration |
c. Vector: Vector image is a made up of point, lines, and curves. All of the shapes within a vector are calculated using a mathematical equation which means the image can scale in size without losing any quality.(IMG 9.08)
 |
| IMG 9.08 Vector illustration |
d. Knolling: The act of arranging different objects so that there are at 90-degree angles from each other, then photographing them from above. It creates a very symmetrical look that feels pleasing to the eye.(IMG 9.09)
 |
| IMG 9.09 A knolling of gaming technologies |
e. skeumorphism: It means when a digital element is designed to look like a replica of the physical work.(IMG 9.10)
 |
| IMG 9.10 A comparison between skeuomorphism and flat design |
f. Crop: When you crop an image, you are cutting away and discarding the unnecessary portions of the image. Cropping allows you to change the emphasis or direction of an image.(IMG 9.11)
 |
| IMG 9.11 Cropping image can let us more focus to the main object |
g. Contrast: Contrast occurs when two elements on a page are different. For example, it could be different colors between the text and the background color or dark vs light colors.(IMG 9.12)
 |
| IMG 9.12 The contrast of the color |
h. Blur: Blur makes images more unclear or less distinct. Using a blur can be a great way to make text stand out when overlaid onto an image.(IMG 9.13)
 |
| IMG 9.13 Blur |
i. Saturation: Saturation refers to the intensity or purity of a color. The more saturated a color is, the more vivid or brighter it appears. Whereas desaturated colors, appear a little duller.(IMG 9.14)
 |
| IMG 9.14 The adjustment of saturation |
j. opacity: opacity enables us to make an element of a design transparent. The low the opacity, the more transparent an element is.(IMG 9.15)
 |
| IMG 9.15 opacity |
3. Words: The art and techniques arranging type to make written language legible, readable, and appealing when displayed. It always used to emphasiss on a theme or a message that designer is trying to convey. Also, words can entice the readers to engage with the text. When it done well, it enhances the message it presents.
There are 3 types of word designs:
1. Designs than include words/phrases because of their ideological meaning or iconic status.(IMG 9.16)
 |
| IMG 9.16 The words show the meaning |
2. Words or phrases that form the actual "content" of the work.(IMG 9.17)
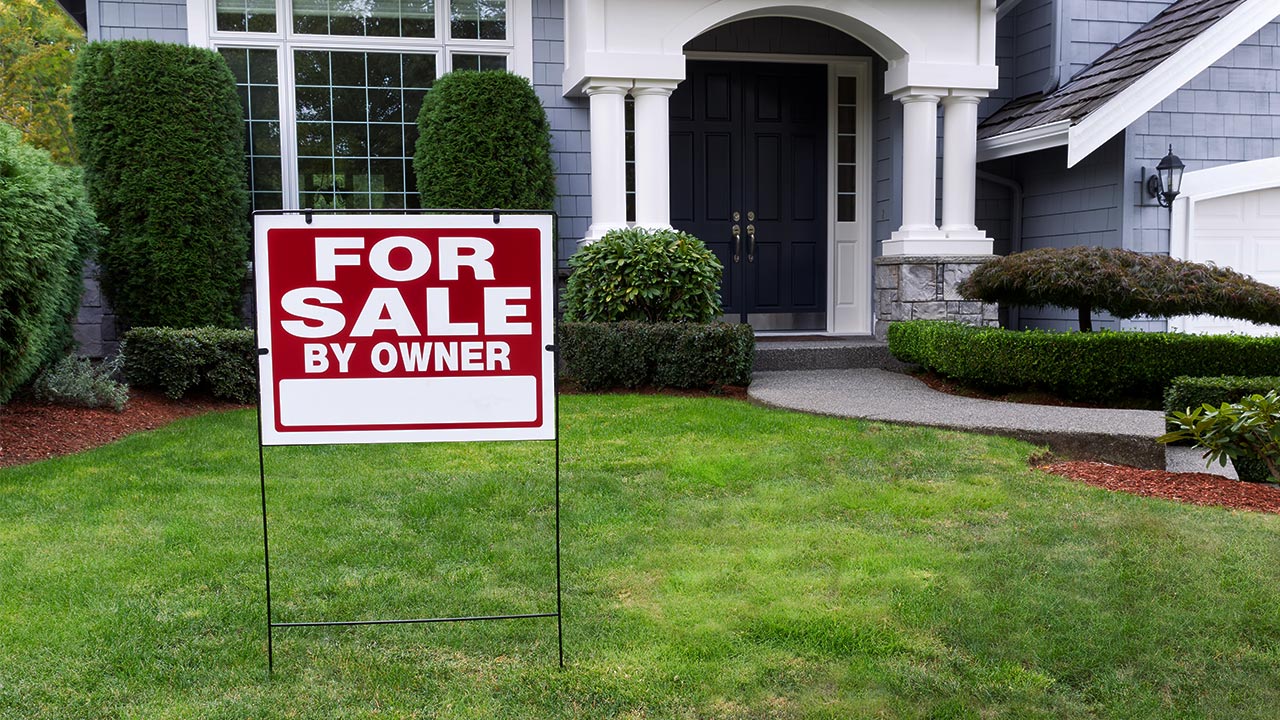 |
| IMG 9.17 From the words we know that the owner is selling the house |
EXERCISE
For this week's exercise, we were asked to take some photos outside the classroom for our exercise. I choose a photo that I used to take in my secondary school.(IMG 9.18)
 |
| IMG 9.18 A sight of the field after raining |
The reason I choose this photo is because I like rainy day. After raining, I always observe the circumstances of my secondary school. This is one of my favourite sight after raining. Because of the ponding, you can see the place by the different perspective and I love the reflection so much. My idea is I wan to make the background blur and let the sight focus to the pond and the reflection.
 |
| IMG 9.19 The original photo |
 |
| IMG 9.20 Because of the bluring, I can focus the sight to the reflection and the pond. |
After that, I decided to show the reflection more clear, I desaturate it to show the effect of monochrome. (IMG 9.21)But I think without desaturation is better, so I just stop and finish my work after blurring.(IMG 9.22)
 |
| IMG 9.21 After the desaturation the pond doesn't seems very obvious |
 |
| IMG 9.22 The completed work |
1.Harmony: A visually satisfying effect which is combining similar or related elements.
There is four ways to achieve harmony such as adjacent colors(IMG 7.01), similar shapes(IMG 7.02), rhythm(IMG 7.03), and repetition(IMG 7.04).
 |
| IMG 7.01 Adjacent color |
 |
| IMG 7.02 Similar shape make harmony |
 |
| IMG 7.03 Rhythm harmony |
 |
| IMG 7.04 Repetition also make harmony |
There is two types of harmony:
1.Harmony by unity: Harmony by unity creates a sense of wholeness, it is a unified design which has consistency of style.Unity occurs when all parts of a design or composition is related to an idea.(IMG 7.05-7.06)
1.Harmony by unity: Harmony by unity creates a sense of wholeness, it is a unified design which has consistency of style.Unity occurs when all parts of a design or composition is related to an idea.(IMG 7.05-7.06)
 |
| IMG 7.05 An artwork created by string instrument |
 |
| IMG 7.06 |
2.Harmony by variety: It is created when different elements and materials are used. Harmony by variety brings a sense of diversity and life to the design.(IMG 7.07-7.08)
 |
| IMG 7.07 Variety color and similar shape create harmony |
 |
| IMG 7.08 |
The combination of unity and variety will create harmony.
(IMG 7.09-7.10)
(IMG 7.09-7.10)
 |
| IMG 7.09 |
 |
| IMG 7.10 |
2.Rhythm: Rhythm is regular spacing of visual elements. It created by repetition of similar shape and line, but with variation, so that there is visual change that the eyes are attracted to. There is 5 types of rhythm which are regular rhythm, random rhythm , alternating rhythm, flowing rhythm, and progressive rhythm.
Regular rhythm: It follows the same intervals over and over again.
(IMG 7.11)
Random rhythm: The repeating of elements with no specific regular intervals.(IMG 7.12)
Alternating rhythm: The repetition of more than one element.
(IMG 7.13)
(IMG 7.13)
Flowing rhythm: The repeating of elements which are following the curves, bends, and undulations.(IMG 7.14)
Progressive rhythm: A characteristic of a motif is changed as it repeats.(IMG 7.15)
 |
| IMG 7.11 Regular rhythm |
 |
| IMG 7.12 Random rhythm |
 |
| IMG 7.13 Alternating rhythm |
 |
| IMG 7.14 Flowing rhythm |
 |
| IMG 7.15 Progressive rhythm |
3.Movement: The path our eyes follow through the artwork. It created by placement in composition, be it shapes, colors, lines, texture, and etc. There are 4 ways to create movement such as rhythm, line, color, and illusion.
Creating movement with rhythm: We can make movement through rhythm, but the artwork must have a motif. Motif means the repeating element that act as a guide through the composition.
(IMG 7.16)
Creating movement with rhythm: We can make movement through rhythm, but the artwork must have a motif. Motif means the repeating element that act as a guide through the composition.
(IMG 7.16)
 |
| IMG 7.16 The artwork which is creating movement with ryhthm |
Creating movement with lines: We can us dynamic line to imply movement. It are often diagonal to the edges of the picture plane and may zig-zag or become sweeping curves.(IMG 7.17)
 |
| IMG 7.17 We can see that the lines show the movement of that people. |
Creating movement with color: We can use light and dark colors to make the movement. Through the contrast of color we can see the movement.(IMG 7.18)
 |
| IMG 7.18 We can see that the light color show the movement |
Creating movement with illusion: The movement is creating through contrast and repetition.(IMG 7.19)
 |
IMG 7.19 The movement is very obvious because of the contrast and repetition.
|
EXERCISE
This week's exercise we need to bring collage materials and glue to create a 2D or 3D artwork according to this week's presentation.
After the presentation, i was trying to make an artwork by using rhythm and repetition. So i used newspaper to make the example.(IMG 7.20)
After the presentation, i was trying to make an artwork by using rhythm and repetition. So i used newspaper to make the example.(IMG 7.20)
 |
| IMG 7.20 You can see the work haven't finish because this is for trying example |
After the first work, I understand how to stick the newspaper correctly to create rhythm. For my formal work, I tried to make the movement of leaves. I used black and skin color to make contrast so that it looks more interesting. Also, I create a rhythm by sticking the paper straightly to show that it are the stems of leaves.(IMG7.21)
 |
| IMG 7.21 My final work for this week |
FEEDBACK
No feedback given by lenturers because Ms Sherry said my group no need to show our works.
Week 7(07/10/19-13/10/19): Dots, line, scale, size
This week my group have a presentation about dots, line, scale, and size. The images below are our presentation.
EXERCISE
This week's exercise we need to use pencil, pen, paint or cut paper to make some works according to the presentation. By the presentation, i decided to use the concept of pointillism to make a landscape.
I decided to make a landscape which is similiar as Fuji mountain in Japan. At first, I try to make the volcano by different color of points so that i can make the image more interesting.(IMG 7.02) After that, i added some sakura trees and clouds. Also, i tried to make a position of volcanic explosion and finished my work.(IMG 7.03)
Week 6(30/09/19-06/10/19): Alignment, Hierarchy, Direction, and Perspective
LECTURE
Week 7(07/10/19-13/10/19): Dots, line, scale, size
This week my group have a presentation about dots, line, scale, and size. The images below are our presentation.
EXERCISE
This week's exercise we need to use pencil, pen, paint or cut paper to make some works according to the presentation. By the presentation, i decided to use the concept of pointillism to make a landscape.
 |
| IMG 7.01 My tools which are brushers and watercolor |
 |
| IMG 7.02 The volcano |
 |
IMG 7.03 Finished work
|
For my second work, i tried to use lines to create a turtle. But it is too boring only make a turtle. So I tried to make a volcano which is is in bird eye position as the shell of turtle. The difficulty is i need to make sure the line is straight to show the movement of shell.(IMG 7.04)
 |
| IMG 7.04 Turtle made by lines |
FEEDBACK
No feedback is given this week.
LECTURE
1. Alignment
The function of alignment is:
1.creates a visual connection between related elements
2.allows one to arrange elements in a way that matches how people naturally scan the page.
Alignment is the arrangement of visual elements in a straight line or in corrective relative positions.
1.creates a visual connection between related elements
2.allows one to arrange elements in a way that matches how people naturally scan the page.
There are two types of alignment which are:
1. Edge alignment:Either positioned at the left, right top or bottom. (IMG1.29).
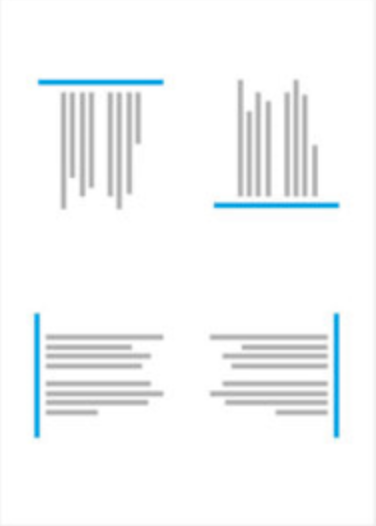 |
| IMG 1.29 Edge alignment |
2. Center alignment: It is aligned to a center line down the middle or across the horizontal.(IMG1.30)
 |
| IMG 1.30 Center alignment |
Good Alignment VS Bad Alignment
 |
| Good Alignment |
 |
| Bad alignment |
3. Mixed alignment: When mixed alignment is intended as a part of the design, it can appear more dynamic and playful.(IMG1.31)
IMG1.31 mixed alignment
4. Simple vs Complex alignment:
A grid can create various types of alignments, two of which are simple alignment and complex alignment
 |
| Simple Alignment |
 |
| Complex alignment |
2.Hierarchy: Hierarchy is the control of visual information in an arrangement to imply importance.We use hierarchy to add structure, create visual organisation, create direction , add emphasis and help a viewer navigate and digest information easily.
There are three types of hierarchy which are:
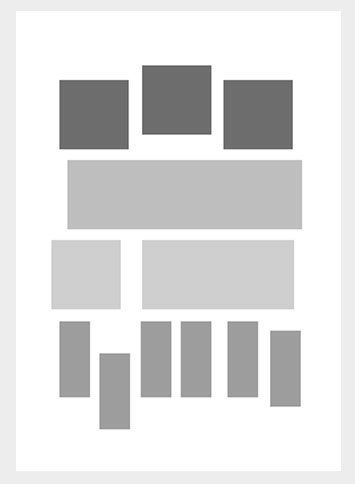
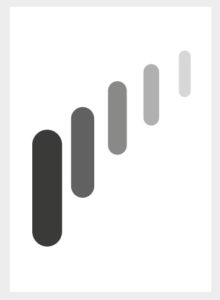
1. Hierarchy in scale: Using the size to emphasis the direction of hierarchy.(IMG1.32)

IMG1.32 hierarchy in scale
2. Hierarchy in color: By changing the colours we have changed the hierarchy structure.(IMG1.32)

IMG1.32 hierarchy in color
3. Hierarchy in contrast:The inside shapes are more darker than those on the outside therefore we perceive them as more prominent.(IMG1.33)

IMG1.33 hierarchy in contrast
4. Hierarchy in space: this can be achieved through the overlapping of elements. The elements at the front will appear closer and clearer to us, hence creating a visual hierarchy.(IMG1.34)
IMG1.34 hierarchy in space
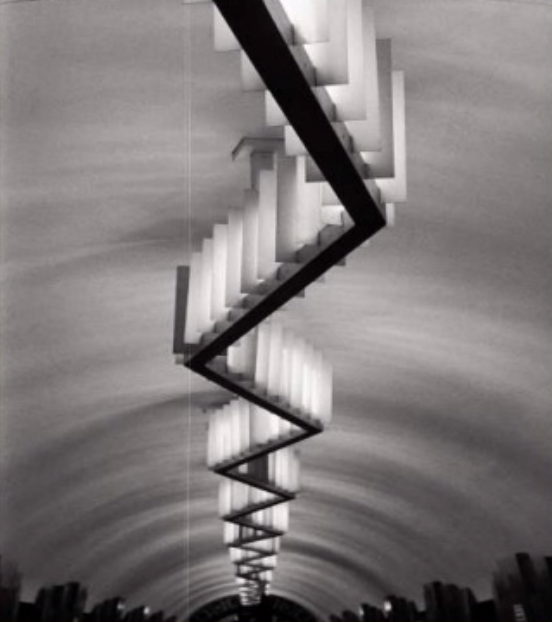
5. Hierarchy in depth: creates an illustration of depth and shapes that appear the most clear to us.(IMG1.35)
 |
IMG1.35 hierarchy in despth
6. Hierarchy in perspective: The flow of hierarchy starts from the front and moves to the back (IMG1.36)
IMG1.36 hierarchy in perspective
3. Direction:Direction is a basic element in design which guides viewers' eyes from one point to another.
There are three types of direction which are :
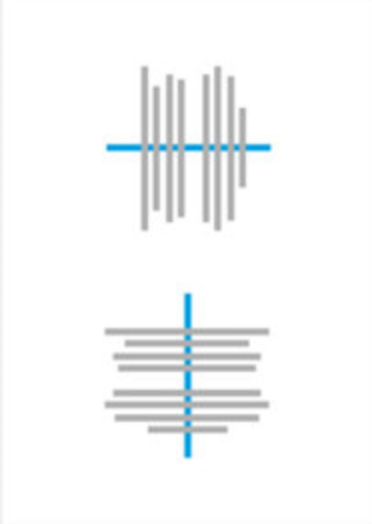
1. Horizontal direction: the direction from left to right and vice versa(IMG1.37)

IMG1.37 horizontal direction
2. Vertical direction: the direction from up to bottom and vice versa (IMG1.38)


IMG1.38 vertical direction
3. Oblique direction: the direction which is diagonal(IMG1.39)

IMG1.39 Leaning tower of Pisa
4. Perspective:The art of representing a three-dimensional object on a two-dimensional surface.
There are two types of perspective which are:
1. Linear perspective:This perspective depicts the illusion of depth through lines.
There are two types of linear perspective such as:
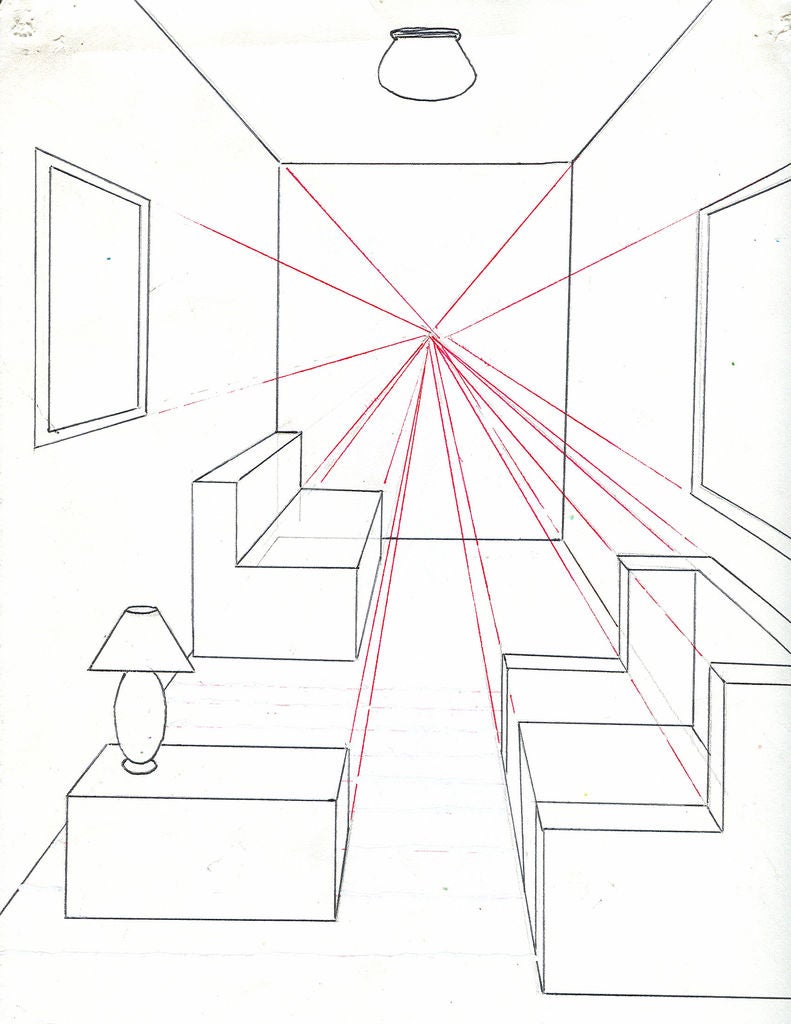
a) One-point perspective:Uses a single point to create illusion of depth(IMG1.40)
IMG1.40 one-point perspective
b) Two-point perspective:More realistic look, include vanishing points outside of the drawing.(IMG1.41)

IMG1.41 two-point perspective
c)Three-point perspective: Third point either below or above a drawing, artist can convey the illustration of height in artwork.(IMG1.42)

IMG1.42 three-point perspective
Bird's eye(IMG1.43)

IMG1.43 Bird's eye
Worm's eye(IMG1.44)

IMG1.44 worm's eye
2. Non-linear perspective:A technique of depicting volumes and spatial relationships on flat surface.
There are three ways to create non-linear perspectives, which is:
1. Size variation:smaller objects look farther away in the distance. Larger objects look closer.(IMG1.45)
IMG1.45 size variation
2. Color: using brightness to control the view of distances.(IMG1.46)
 |
| IMG 1.46 The red color make the plant more forward |
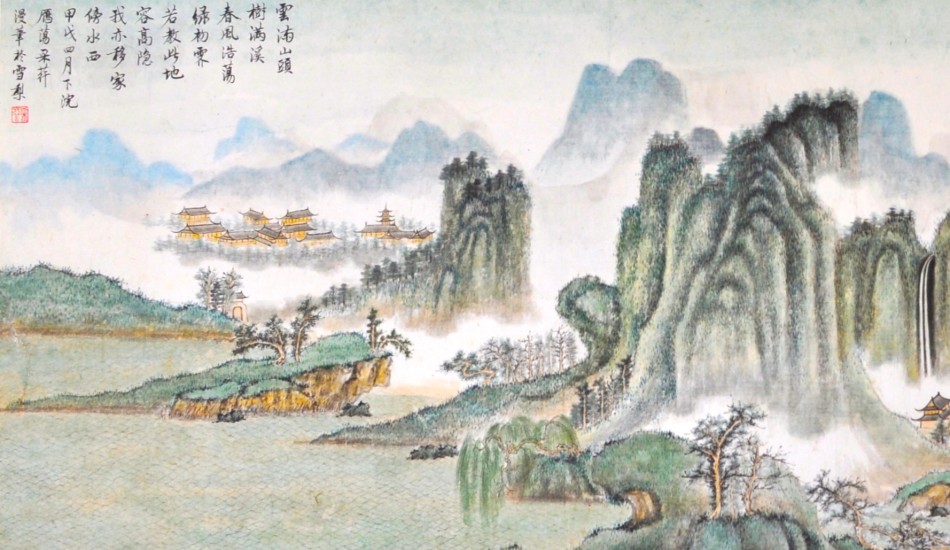
3. Value: lighter values look like they are farther back and darker value look like they are closer.(IMG1.47)
IMG1.47 value
EXERCISE
This week's exercise we are using recycle to create a 2D or 3D work according to the presentation.I brought a lot of recycle materials from my hometown and I decided use them to create my hometown 3D work.(IMG 1.48)

IMG1.48 The recycle materials I bring
The hardest part of this exercise is we need to use glue to stick these materials.Some of the materials is unable to use normal glue to stick, so I borrow a 3 seconds glue from my classmate.
Firstly,I created a guideboard to mention the name of my hometown which is Muar.(IMG1.49)

IMG1.49 Muar town guideboard
Also I created some marsh tree and train that you can found in Muar.

IMG1.50 paper tree

IMG1.50 tree+guideboard+train in bird's eye

IMG1.50
Lastly, I created the building which is the sign of Muar.You can see it on the right side of the completed work.(IMG1,51)

IMG1.51

IMG1.51

IMG1.51

IMG1.51 final work in eye's bird
Even though this is not a perfect work.But i am proud with my work and my hometown "Muar".
Week 5(23/09/19-29/09/19): Pattern, Repetition, Texture, and Surface
LECTURE
1.Pattern
There are 4 types of pattern which are branching, meandering, spiral, packing, and cracking.
A)Branching- A pattern that branches out something from a point.(IMG 1.08)

IMG1.08 branching pattern
B)Meadering-A pattern with the repetition of an undulating line.(IMG1.09)

IMG1.09 meandering pattern
C)Spiral-A pattern with a curving wind.(IMG1.10)

IMG1.10 spiral pattern
D)Packing and Cracking-A pattern that a thing is packed and crack(IMG1.11)

IMG1.11 packing and cracking pattern
2. Repetition
The action of repeat over and over again.
There are two types of repetition which are regular repetition and irregular repetition.
The action of repeat over and over again.
There are two types of repetition which are regular repetition and irregular repetition.
A)Regular repetition(IMG1.12)

IMG1.12 regular repetition
B)Irregular repetition(IMG1.13)

IMG1.13 irregular repetition
3. Texture
There are 3 types of texture which are physical/tactile texture,visual/implied texture and hypertexture
There are 3 types of texture which are physical/tactile texture,visual/implied texture and hypertexture
A)Physical/Tactile texture(IMG1.14)

IMG1.14 physical/tactile texture
B)Visual/Implied texture(IMG1.15)

IMG1.15 visual/implied texture
C)Hypertexture(IMG1.16)

IMG1.16 hypertexture
Texture in painting
There are also different types of textures in painting, such as
A)Actual texture: formed with the heavy build of paint(IMG1.17)

IMG1.17 actual texture
B)Abstract texture: the concept of the object is translated in textural patterns, instead of presenting it directly.(IMG1.18)

IMG1.18 abstract texture
C)Simulated texture: formed when the visual effect of texture is created without adding to it.(IMG1.19)

IMG1.19 simulated texture
D)Invented texture: An interesting texture created when alternate texture are created.(IMG 1.20)

IMG1.20 invented texture
4. Surface
The top layer of something where any type of artwork is applied on for enhancement of visual appearance and functionality (IMG1.21)

IMG1.21
EXERCISE
This week's exercise we have a pattern-making exercise.The materials are any vegetables or items that can be used as a stamp for printing.So I chose my favourite vegetables which are cabbage and onion.I use purple color for onion and yellow color for cabbage to make a contrast between the color.(IMG1.22)

IMG1.22 cabbage and onion
This is the work that I completed at home.Ms. Sherry said the texture of onion look nice.(IMG1.23)

IMG1.23 The final work
I used these material for my in-class work.(IMG1.24-1.28)

IMG1.24

IMG1.25 vertical purple potato

IMG1.26 spiral potato

IMG1.27 potato in green color

IMG1.28
Week 3(09/09/19-15/09/19): Symmetry, Asymmetry, and Balance
LECTURE
This week have a topic about symmetry and asymmetry.
Lecturer started introduce this topic by powerpoint presentation.
There is some picture about this topic introduced.(IMG1.05)(IMG1.06)

IMG1.05 symmetry and asymmetry

IMG1.06 symmetry legs
Ms Sherry also shared some photos which she take in a lot of places in Malaysia. So glad to see our lecturer admire our cultures.
EXERCISE
This week's exercise lecture assigned us to do an exercise either symmetry or asymmetry by using watercolor or pastel.
I chose watercolor because it is my favourite tool to make an artwork.I knew that there will a lot of people prefer to make an symmetry artwork,so i chose asymmetry to express my artwork.I like to draw leaves by using watercolor,so i tried to use leaves and roots to show asymmetry.This is the completed work.(IMG1.07)

IMG1.07 Balance and Asymmetry roots
FEEDBACK
I told Ms Sherry that my work is asymmetry, she agreed that but something made me surprise is she said that there is also a balance in my work.
Week 2 (02/09/19 - 08/09/19): Gestalt
LECTURE
This week our lecturers introduced a very interesting topic for me which is gestalt.Gestalt is an artwork that you can find more than one thing inside the image.(IMG 1.01-1.04)


LECTURE
This week our lecturers introduced a very interesting topic for me which is gestalt.Gestalt is an artwork that you can find more than one thing inside the image.(IMG 1.01-1.04)
IMG1.01 panda

IMG1.02 key
IMG1.03 hawk

IMG1.04 3 different gestalt
EXERCISE
Lecturer asked us to do an exercise about Gestalt by using glue,black paper and white paper.
It's quite hard to design a gestalt picture, I used a lot of time to think about my gestalt images.
I tried to make a gestalt with my favourite instrument which is French horn,I combined French Horn with a High clef.If you reverse the picture,you could see there is a Bass Clef. The reason I put in the Bass Clef is people always think French Horn can only play high range,actually French Horn also can play a very low range.(IMG1.09)

IMG1.09 The draft of my first idea

IMG1.10 The final work
The completed work is bad because it is difficult to cut down the picture.(IMG1.10)
I am really hate the person who smokes,i trust that smoking make us unhealthy,so i drafted this out(IMG1.11)

IMG1.11 The draft of the second idea

IMG1.12 The final work
FEEDBACK
Ms Sherry said the skeleton need to look more like smoke and I need to use the space better as I can.But she also said that I am successfully contact the message with the image which is smoking bring unhealthy.
Week 1 (26/08/19 - 01/09/19): Contrast
At the first class, our lecturers make an introduction. From the introduction, i know that our lecturers' name are Dr Yip Jin Chi and Dr Sherry. They gave us a piece of paper with some questions that we need to ask our partner which is sitting next to us. My partner is Dondo who is came from Indonesia. After the ice breaking, our lecturers start briefing about contrast which is one of a design principles. Lecturer showed us some example of contrast and brought us to visit an exihibition which is beside Starbucks. The exhibition is exhibit a lot of beatiful illustrations which are made by one of our senior.
At the first class, our lecturers make an introduction. From the introduction, i know that our lecturers' name are Dr Yip Jin Chi and Dr Sherry. They gave us a piece of paper with some questions that we need to ask our partner which is sitting next to us. My partner is Dondo who is came from Indonesia. After the ice breaking, our lecturers start briefing about contrast which is one of a design principles. Lecturer showed us some example of contrast and brought us to visit an exihibition which is beside Starbucks. The exhibition is exhibit a lot of beatiful illustrations which are made by one of our senior.
EXERCISE
Lecturer asked us to create an artwork about contrast by using A4 Black/white paper. I try to figure it out by drawing some circle, i try to make a white triangle in the middle and I think this is contrast.(IMG 1.05)
Lecturer asked us to create an artwork about contrast by using A4 Black/white paper. I try to figure it out by drawing some circle, i try to make a white triangle in the middle and I think this is contrast.(IMG 1.05)

IMG1.05
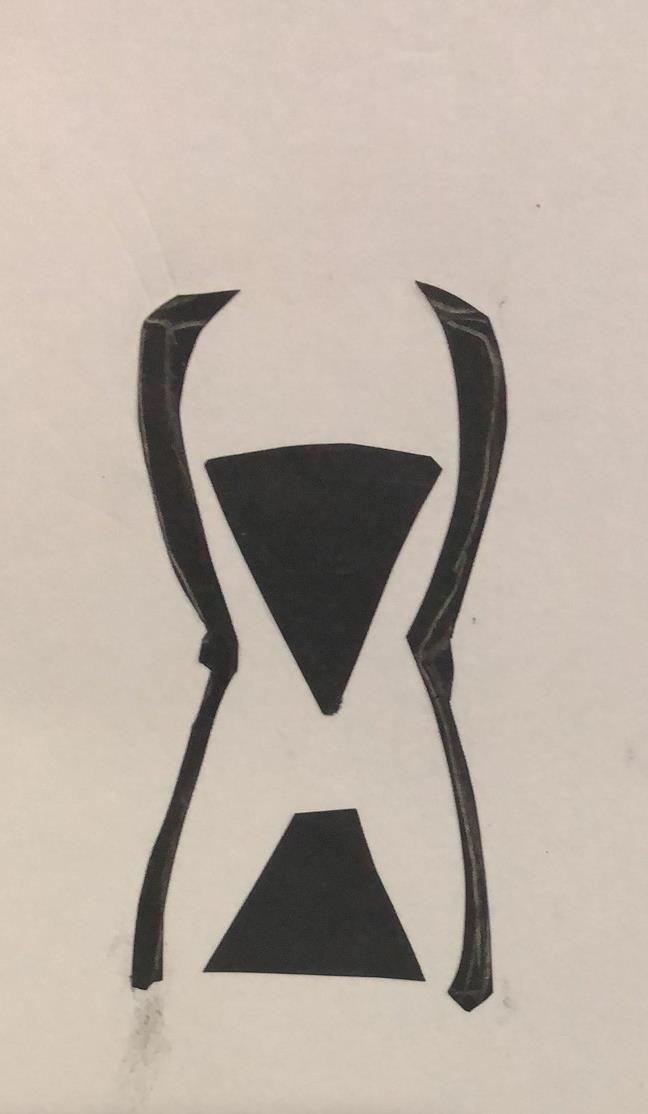
After that, I started finding some photos to inspire me.From some photos I saw in Facebook,I made this kind of contrast works.(IMG1.06-1.08)

IMG1.06 My final work
 |
| IMG 1.07 Sandglass |

IMG1.08
FEEDBACK
Lecturer said if i finished more than one work, just choose one of the work as my final work.
Lecturer said if i finished more than one work, just choose one of the work as my final work.


Comments
Post a Comment